a
f
e
r
m
e
n
t
e
d
Oh My REJUVELAC
a live culture drink
made from sprouted grains
d r i n k
e q u i p m e n t
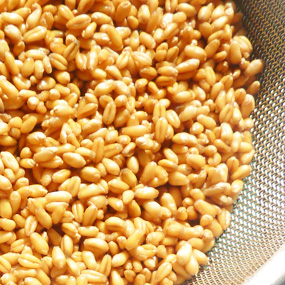
- Sprouted Wheat Berries
1.3c./3 dl - Sprouted Rye
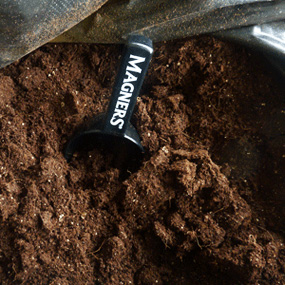
0.2c./0.5dl - Honey
2 tbs - Water
12c./3 l - A Jar or Bucket
- Bottles/Jars for storage
i
n
g
r
e
d
i
e
n
t
s

a delightful discovery
The main reason to drink Rejuvelac is to boost and aid the digestive system. It will be in Top Gear of optimal performance. And as a result of a high peak functioning digestive system, I experienced changes to the skin. It was and is a delightful discovery. When drinking Rejuvelac on a regular basis the skins' texture changed. It became ELASTIC. Ladies and others of all kinds, it becomes ELASTIC!! The Rejuvelac is filled with active and alive enzymes from the fermentation process. e.g it's a Vitamin E boost of many boosts. Vitamin E is also known as a youth vitamin. It doesn't take long time to notice the change. Drink it for a week and feel and see the difference. Drink it longer and the needs for creams of all kinds will dwindle. Drink it daily and you will truly have a different platform for the body to work efficiently. And a radiant elasticated skin! It's some kind of 'magic' feeling when drinking it too. It's felt instantly. You just feel good. It taste good too. It take some days to prepare so some plans are needed.
First time learning to make this drink was 12 years ago, at the Living Food center Skeppsgarden in Valdermarsvik in Sweden. One get knowledge about Living Food in the spirit of Ann Wigmore’s Living Food. I was there for theoretical and practical course about Living Food with my mom. We both drink it since then. And dad! The recipe was invented by Ann Wigmore.
how to make rejuvelac, day by day

day 1
In the evening, rinse and wash the seeds well. Remove seeds floating up to the surface. They are dead. This is a living drink, we don't want anything dead in it. Soak in the jar over night, 12 hrs.
In the morning rinse well, drain, and put the seeds back in the jar. Without water. The seed will now sprout for the rest of the day.
Total sprouting time are 48 hrs.

day 2
Another sprouting day. No rinsing needed. Put a kitchen towel/breathable cloth over the jar/bucket. It's important to do a quick rinse before topping up the jar day 3. To remove any kind of mold. Just a quick rinse.

fermentation
In a fermentation process living bacteria and micro organisms are developed. Rejuvelac is a living drink! It's alive. Fermentation is not anything new. Fermented food has in history been a preservation method. And of course the Vikings made Mjöd, a fermented alchoholic drink. The honey activates the fermentation process.

day 3 & 4
Keep the sprouted seeds in the jar. Top it up with water. Add 2 tbs of honey. Leave to stand for 48 hours covered with a kitchen towel/breathable cloth. Keep the jar in room temperature. 70F/21C is at least needed to activate the fermentation process. An active fermentation process is shown with bubbles and a layer of foam. Color is milky cloudy. It's also slightly carbonated.

day 5
The rejuvelac is now ready. Smell it. Taste it. The taste is acidic, tart, fresh. The color is whiteish as milk (Latin Lac = Milk). Refill the jar/bucket with new water+add 2 tbs of honey. Leave to stand for 24 hrs (not 48 hrs) for another batch. Repeat this 24 hrs cycle three times. Pour the ready Rejuvelac into bottles and refrigerate. In warmer climate, lets say a la Spain, one have to keep an extra eye on it due to the heat.

storage
The Rejuvelac will keep fresh and alive for 7 days refrigerated. Drink rejuvelac at room temperature. It's easy to get addicted. One can also have a cycle of 2 or 3 batches, and have fresh rejuvelac ready daily, and less time stored. The enzymes and the micro organisms slows down in cold temp.

the after life of the grains
The sprouted grains used during the fermentation process does not need to thrown away. It can be used as food for the wild birds. Here is a Goose friend I met at the Ouse River here in York.